Reusable React Native Components

Authors
Wojciech Szafraniec
Software Engineer
@
Callstack

For most people who are new to React Native it’s pretty hard to find simple methods to customize components that could be reused within the app. This article will help you create more efficient code with less effort during development process.

Some basics at the beginning. There are three main patterns to customize components

  1. Pass data via props
  2. Nest component
  3. Higher order component

Let’s go through them using a simple button component as an example. It’s really important to choose best solution depending on the use case and make them more reusable because it will save your time and allow you write less code.

1. Pass data via props

First method is the most common. While creating component we need to think about best setup of props that can be reused with different values. I’ll explain it on <Button /> example. Our basic component has initial values set in props, label with text displayed on the button, buttonStyle with style of component, textColor for style of text, onPress for an action on button press.

import React from 'react';
import {
StyleSheet,
Text,
TouchableOpacity,
} from 'react-native';
export default function Button({
onPress,
label = 'Click me',
buttonStyle = styles.button,
textColor = styles.text,
}) {
return (
<TouchableOpacity style={buttonStyle} onPress={onPress}>
<Text style={textColor}>{label.toUpperCase()}</Text>
</TouchableOpacity>
);
}
Button.propTypes = {
onPress: React.PropTypes.func.isRequired,
label: React.PropTypes.string,
buttonStyle: React.PropTypes.any,
textColor: React.PropTypes.any,
};
const styles = StyleSheet.create({
button: {
width: 150,
height: 75,
backgroundColor: 'ivory',
borderRadius: 5,
justifyContent: 'center',
alignItems: 'center',
marginVertical: 15,
},
text: {
color: 'red',
fontSize: 16,
},
});
view raw Button.js hosted with ❤ by GitHub

<Button /> is ready to use in multiple places, but if we want adapt it for a different use case we can simply change its behavior via props. It happens pretty often that we have to modify styles or text a bit in the other view.

import React, { Component } from 'react';
import {
AppRegistry,
StyleSheet,
Text,
View
} from 'react-native';
const buttonPressed = () => {
console.log(`It's working.`);
};
import Button from './Button';
export default class CustomizeComponents extends Component {
render() {
return (
<View style={styles.container}>
<Button onPress={buttonPressed} />
<Button
header='Press me'
buttonStyle={styles.square}
textColor={styles.squareColor}
onPress={buttonPressed}
/>
</View>
);
}
}
const styles = StyleSheet.create({
container: {
flex: 1,
justifyContent: 'center',
alignItems: 'center',
backgroundColor: 'lightskyblue',
},
square: {
width: 100,
height: 100,
backgroundColor: 'ivory',
justifyContent: 'center',
alignItems: 'center',
marginVertical: 15,
},
squareColor: {
color: 'rebeccapurple',
fontSize: 16,
},
});
AppRegistry.registerComponent('CustomizeComponents', () => CustomizeComponents);
view raw index.js hosted with ❤ by GitHub

First button is our basic one which will be used the most, but for some other scenario we might want to display it with different look, so changing it via props is the best solution.

2. Nest component

This method is useful if we want to reuse a variant of the button in several places. The problem is we have to override the styles in every place we want to use them. It simply comes to copy-pasting the code. We can write the variant as a new component with overrides already applied, and then reuse that. Lets create a function in Button.js with onPress argument passed from container and other props defined inside.

Button.Brown = ({ onPress }) => (
<Button
onPress={onPress}
header="Click here"
buttonStyle={styles.brownButton}
textColor={styles.brown}
/>
);

For now if we want to use brown button in several places, much simpler!

Just import the component where you want to use it.

import Button from '<path>/Button';
view raw import Button hosted with ❤ by GitHub

import Button from '/Button';

and call for it in return

<Button.Brown onPress={buttonPressed} />
view raw gistfile1.txt hosted with ❤ by GitHub

3. Higher order component

Higher order components can be used to enhance another component with a new behaviour. HOCs are basically the functions which return a new component wrapping another component, i.e. I’ll add simple animation on one of the buttons instead of multiplying animations in buttons. Let’s add a simple scale animation on the button when pressed.

import React from 'react';
import { View, Animated, Easing } from 'react-native';
const withScaleAnimation = (Component) => class withScaleAnimation extends React.Component {
static propTypes = {
onPress: React.PropTypes.func,
}
constructor () {
super();
this.state = {
scaleValue: new Animated.Value(1),
};
}
scaleAnimation = (callback) => {
Animated.sequence([
Animated.timing(
this.state.scaleValue,
{
toValue: 1.2,
duration: 250,
easing: Easing.linear,
}),
Animated.timing(
this.state.scaleValue,
{
toValue: 1.0,
duration: 250,
easing: Easing.linear,
})
]).start(callback);
}
animatedOnPress = () => this.scaleAnimation(this.props.onPress);
render() {
const { onPress, ...passProps } = this.props;
const animationStyle = {
transform: [
{ scaleX: this.state.scaleValue },
{ scaleY: this.state.scaleValue },
]
};
return (
<View>
<Animated.View style={animationStyle}>
<Component onPress={this.animatedOnPress} {...passProps} />
</Animated.View>
</View>
);
}
};
export default withScaleAnimation;

Since we’re passing a custom onPress, we need to take care of calling the onPress prop passed by the user in callback of animation function. In render method we must separate onPress from rest of props. So the old one will be overwritten by new onPress. Action of button will start right after animation and other props are passed to wrapped component. To keep our code clean, I prefer to use HOC’s inside of components code. In Button.js we just pass to function any of buttons as the argument.

export const AnimatedBasicButton = withScaleAnimation(Button);

In container we can use it like any other component

<AnimatedBasicButton onPress={buttonPressed} />

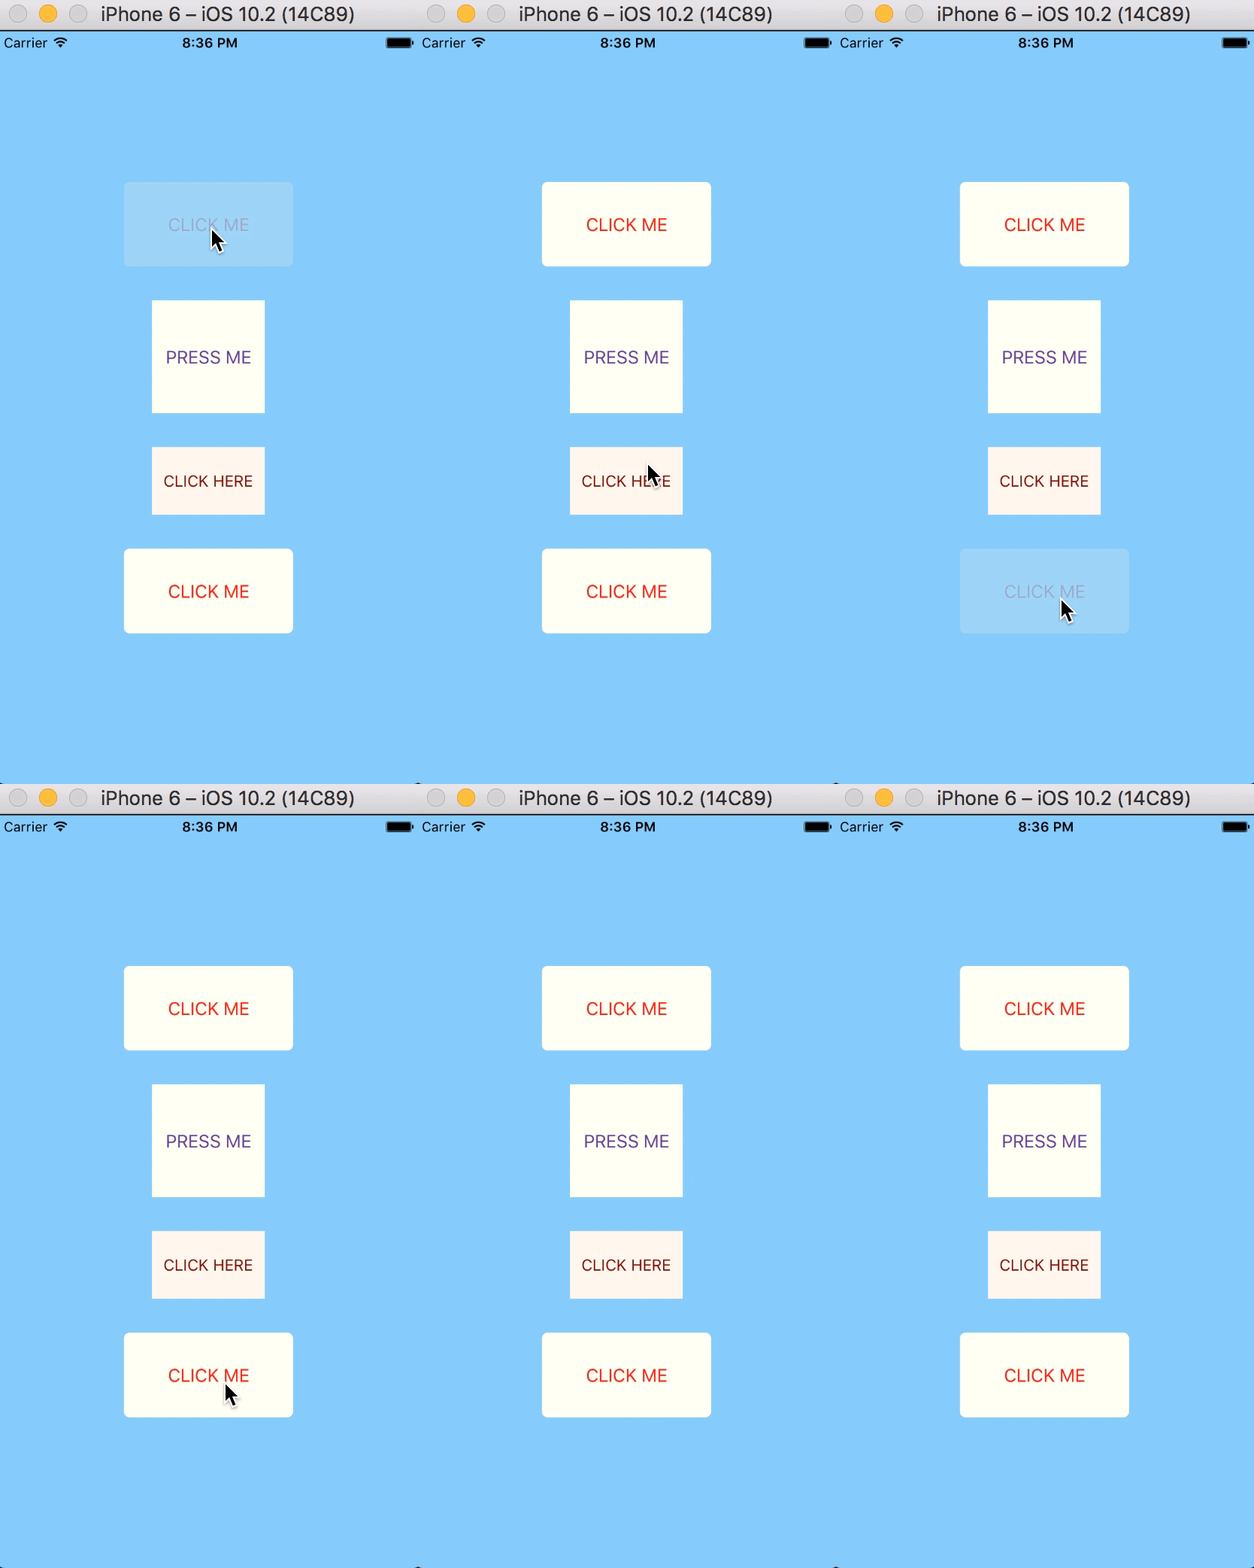
On emulator it looks like this:

Reusable components React Native emulator

I hope that after reading this post you learned about optimization of code and making your component reusable. It’s important to think wider about small elements, if they are unique or more common, their variations within the app and so on… With good choices life can be much easier and tasks less time-consuming.

There's a github repo with example.

Insights

Learn more about Scalability

cover

Jul 16Podcast

Structure Monorepo for Speed, Scale & Sanity

Discover how Nx empowers teams to build and scale monorepos without losing their sanity, from selective testing to AI-powered workflows.

Event Cover

Sep 7Talk

The Invisible Architect

Learn how communication shapes your app development, from code to design. Discover React’s role and leverage Conway’s Law for success.

cover

Dec 27Article

Why Is It Important to Always Run The Latest Version of React Native?

Upgrade your app to the latest version to get more features and better support. Find out more in our article.

cover

Aug 13Article

12 Rules and Approaches of Code Writing for Beginners

If you are a beginning programmer, we prepared a list of 12 rules and approaches of code writing that will help you in your coding journey!

cover

May 28Article

Building Component Libraries for React Native Apps

Satyajit Sahoo shares insights on building component libraries for React Native apps.

cover

Nov 23Article

React Developer’s Everyday Struggle - Extending Big Applications

Do you struggle with extending bigger applications? Check the solutions we arrived at while working on the EEDI app. Contact us to discuss your project!

cover

Feb 8Article

Four Tips to Write Maintainable React Components

React - the declarative UI framework that simplifies development. Read our articles for more details.

cover

Mar 19Tutorial

The Hard Way vs. The React Native AI SDK Way: Stop Writing Custom Modules for Every Model

Learn how React Native AI uses a unified provider model to switch between cloud and on-device LLMs without rewriting application logic, enabling reliable AI experiences online and offline.

cover

Mar 12Tutorial

Build Smarter Apps: Tool Calling & AI Orchestration Explained

Learn how on-device models in React Native can call tools, interact with external APIs, and return structured outputs you can use directly in application logic.

cover

Mar 5Tutorial

MLC LLM + React Native: On-Device AI Without the Pain

Learn how to run third-party on-device LLMs in React Native using MLC LLM. Choose your models, run them efficiently across platforms, and keep a unified JavaScript API with React Native AI.

cover

Feb 24Tutorial

Intelligent Fallbacks with Apple Intelligence in React Native

Learn how to use Apple’s built-in Foundation Models in React Native apps, reduce memory usage, and enable fast, fully on-device AI with React Native AI Apple.

cover

Feb 10Tutorial

What Is the React Native AI SDK? A Complete Intro & Quickstart

Learn why on-device AI matters for React Native apps, how local LLMs behave offline, and what problems React Native AI is designed to solve from day one.

cover

Jan 29Tutorial

Implementing an Android TurboModule with Kotlin

Learn how to implement a React Native TurboModule on Android, from the TypeScript spec and Codegen to the Kotlin implementation and package registration.

cover

Jan 19Tutorial

Working with Different Threads in Swift TurboModules

Learn how JavaScript, native module, background, and main threads interact in React Native TurboModules, and how to use GCD queues to run async work safely in Swift.

cover

Jan 9Tutorial

How to Add Type-Safe Constants to Swift TurboModules

Learn how to expose typed, immutable constants from a Swift TurboModule using Codegen, and get full end-to-end type safety between native and JavaScript.

cover

Dec 30Tutorial

Adding Event Emitters to Your TurboModule in Swift

Learn how to emit native events from a Swift TurboModule and subscribe to them in JavaScript, including proper memory management and Codegen integration.

cover

Dec 22Tutorial

Writing Your First TurboModule in Swift

Learn how to build a fully working TurboModule in Swift, integrate it with Codegen, and bridge it through Objective‑C inside an Expo app.