Supercharge Your Terminal With Zsh

I spend most of my time on my laptop in 3 apps, a browser, a code editor and a terminal emulator, so I want things to look pretty and be useful in my terminal. After a lot of tweaking, I think I finally have a decent terminal configuration using Zsh which I’ll share in this article.

Zsh is an interactive shell similar to bash (the default shell on macOS and Linux systems). What’s great about Zsh are the features such as autocompletion and the customization options available. For someone like me who forgets and mistypes commands all the time, autocompletion is a life-saver. It’s because of autocompleting that nobody knows how terrible I am at coding.

Switching to Zsh

Zsh is installed in the default installation on macOS but installing via brew ensure that we have the latest available features and bug fixes. To install Zsh on macOS, run the following if you already have Homebrew:

brew install zsh

For other Operating Systems, it should be available to install from the default repositories.

To change the default shell to Zsh, you can use the <rte-code>chsh<rte-code> command, However, you need to add Zsh to your shells list first:

grep -q -f $(which zsh) /etc/shells || echo $(which zsh) | sudo tee -a /etc/shells
view raw chsh.js hosted with ❤ by GitHub

Then run the following to switch the shell to Zsh:

chsh -s $(which zsh)
view raw shelltozsh.js hosted with ❤ by GitHub

I’ve spent a lot of time configuring Zsh to have a great autocompletion experience. Sure, I could use the Fish shell instead, but Zsh’s syntax is much closer to bash, which is a big reason I prefer Zsh.

When I searched the web on how to configure Zsh, most of the guides I found used Oh My Zsh. While it provides a great set of default configuration and plugins, it’s so bloated that it’ll reduce the startup time of the shell by several seconds. I was using it for a while, but I don’t think I even used 1% of what it has, all I wanted was a good autocompletion and few other niceties. It was unreasonable to use Oh My Zsh to spend seconds staring at the terminal while it starts up every time.

So I decided to switch to antibody to manage my Zsh plugins. While it’s not as feature-rich as Oh My Zsh and I will need to configure things manually, it’s much faster – and while it took a fair amount of time to tweak the config, the actual amount of config needed isn’t that much. The speedup was totally worth it.

Ok, enough blabbering. Now, let’s configure our shell. Note that I didn’t cover any aliases or plugins providing aliases here since they are not specific to Zsh and aliases are more like personal preferences. All the code I have mentioned below need to be added to the <rte-code>~/.zshrc<rte-code> file.

Enabling autocompletion

The first thing we want is autocompletion. To initialize the completion system, we need to load <rte-code>compinit<rte-code>. However, loading the completions every time can slow down the startup time. Fortunately, we can use a cache for faster startup. To load <rte-code>compinit<rte-code>, let’s add the following to the <rte-code>~/.zshrc<rte-code> file:

autoload -Uz compinit
typeset -i updated_at=$(date +'%j' -r ~/.zcompdump 2>/dev/null || stat -f '%Sm' -t '%j' ~/.zcompdump 2>/dev/null)
if [ $(date +'%j') != $updated_at ]; then
compinit -i
else
compinit -C -i
fi
view raw zshrcfile.js hosted with ❤ by GitHub

‍
Next thing we need to load is the <rte-code>complist<rte-code> module. It provides a menu list from where we can highlight and select completion results. To load it, we just need to add the following:

Configuring Zsh

By default, Zsh doesn’t save the history to the disk for the commands we have typed. Since the history is often useful and can be used to provide autosuggestions, we would want to save the history. To do it, we just need to specify the number of entries to store and a file name where to save the history:

HISTFILE=$HOME/.zsh_history
HISTSIZE=100000
SAVEHIST=$HISTSIZE

We might also want to configure some more options to improve how the history is saved, for example, eliminating duplicate entries from the history:

setopt hist_ignore_all_dups # remove older duplicate entries from history
setopt hist_reduce_blanks # remove superfluous blanks from history items
setopt inc_append_history # save history entries as soon as they are entered
setopt share_history # share history between different instances of the shell

A cool feature in Zsh is the ability to navigate to a directory without typing cd. For example, if we type projects and there’s a directory named Projects, Zsh can automatically cd to the directory unless projects is a command available in the path. I use this feature all the time and miss it a lot when I ssh to a server where I don’t have it. To enable it, we can do the following:

setopt auto_cd # cd by typing directory name if it's not a command

I make typos all the time. Zsh can autocorrect those typos and ask us to run the correct command when we try to run a wrong command. To enable it, we can do the following:

setopt correct_all # autocorrect commands

When we type a command and press the tab key, Zsh shows a list of completion items. We can tweak a few things to improve the autocomplete menu:

setopt auto_list # automatically list choices on ambiguous completion
setopt auto_menu # automatically use menu completion
setopt always_to_end # move cursor to end if word had one match

We can also tweak the UX of the autocompletion menu to match even if we made a typo, and enable navigation using the arrow keys:

zstyle ':completion:*' menu select # select completions with arrow keys
zstyle ':completion:*' group-name '' # group results by category
zstyle ':completion:::::' completer _expand _complete _ignored _approximate # enable approximate matches for completion
view raw arrowkeys.js hosted with ❤ by GitHub

Now we get autocompletion with a list of suggestions from where we can select the options with the tab key or the arrow key:
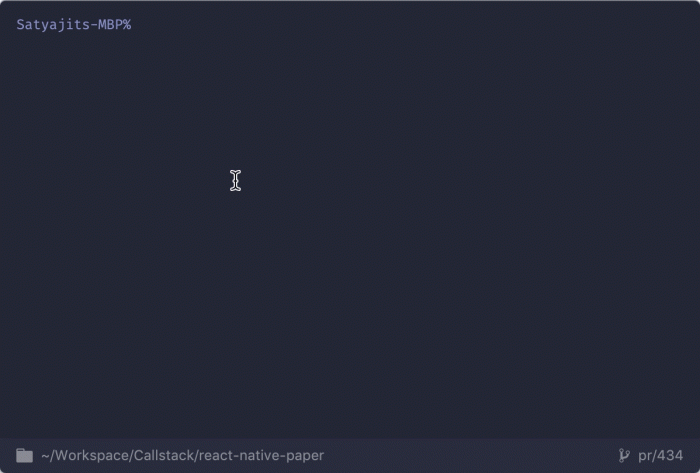
autocompletion with a list of suggestions

One issue with Zsh is that the delete key doesn’t work as expected and inputs ~ instead. To work around this, we need to add the following keybindings:

bindkey '^[[3~' delete-char
bindkey '^[3;5~' delete-char
view raw keybindings.js hosted with ❤ by GitHub

Plugins

The next step is to install some plugins to improve the experience even more. To install the plugins, we are going to use antibody. You can follow the installation instructions on the website. I use the following plugins:

zdharma/fast-syntax-highlighting

This plugin provides syntax highlighting for the commands we type in the Terminal. In addition, when we’re typing a command, it’ll be highlighted in red if it’s invalid and in green, if it’s valid.
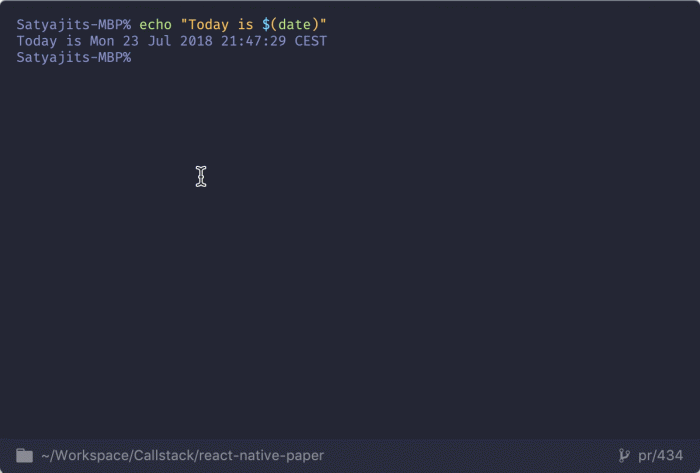
zdharma/fast-syntax-highlighting plugin

This plugin is also needed by the <rte-code>zsh-users/autosuggestions<rte-code> plugin, which we’ll install next. To use it, add the following to your <rte-code>~/.zshrc<rte-code>

antibody bundle zdharma/fast-syntax-highlighting
view raw zshrc.js hosted with ❤ by GitHub

zsh-users/zsh-autosuggestions

This plugin will suggest commands as you type, which you can select with the right arrow key (➡). The suggestions are based on the history.
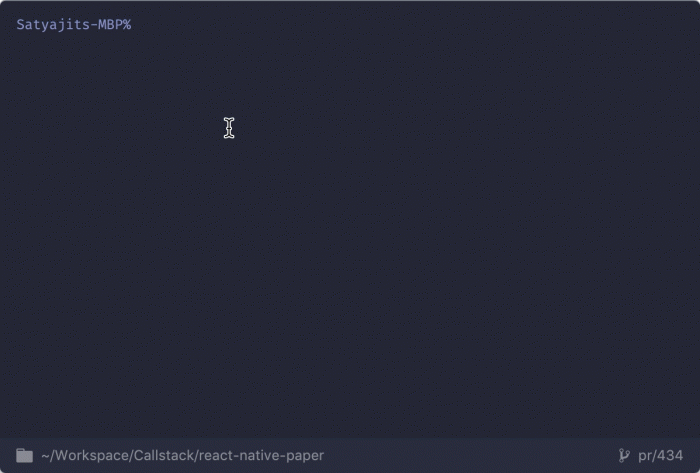
zsh-users/zsh-autosuggestions plugin

To use it, add the following to your <rte-code>~/.zshrc<rte-code>

antibody bundle zsh-users/zsh-autosuggestions
view raw addzshrc.js hosted with ❤ by GitHub

This plugin allows you to type part of a command which exists in the history, and then select matching commands with specific keys, for example, to select with up and down arrow keys, we need to add the following configuration:
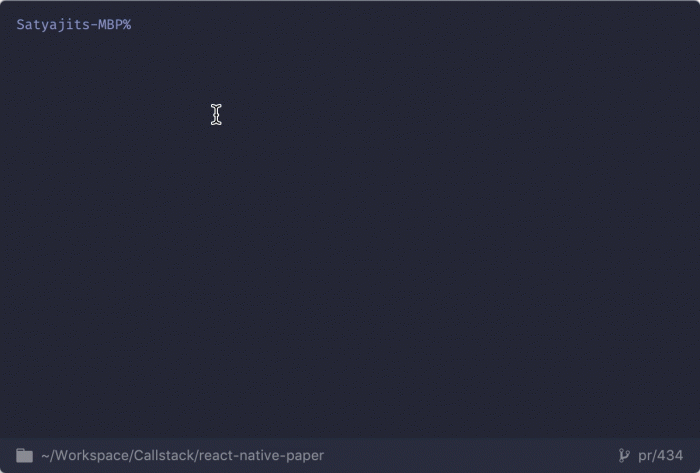
bindkey '^[[A' history-substring-search-up
bindkey '^[[B' history-substring-search-down
view raw bindkeys.js hosted with ❤ by GitHub

‍

zsh-users/zsh-history-substring-search plugin

To use it, add the following to your <rte-code>~/.zshrc<rte-code>

antibody bundle zsh-users/zsh-history-substring-search

zsh-users/zsh-completions

This plugin provides additional completions not available in Zsh yet. To use it, add the following to your <rte-code>~/.zshrc<rte-code>

antibody bundle zsh-users/zsh-completions

marzocchi/zsh-notify

This plugin shows a desktop notification when a command takes a long time to finish or fails if the Terminal tab is inactive. Unfortunately, it doesn’t work with Hyper on macOS which I use. But it should work if you use one of the supported Terminals, or you’re on Linux.

To use it, add the following to your <rte-code>~/.zshrc<rte-code>

antibody bundle marzocchi/zsh-notify
view raw marzocchi.js hosted with ❤ by GitHub

If you’re on macOS, you also need to install <rte-code>terminal-notifier<rte-code>

buonomo/yarn-completion

Being a web developer, I work with yarn every day. This plugin provides autocompletion for yarn commands and scripts, which is a huge help. In addition, we can see all the available scripts without having to open the <rte-code>package.json<rte-code> file directly in the terminal.
gif presenting buonomo/yarn-completion plugin

To use it, add the following to your <rte-code>~/.zshrc<rte-code>

antibody bundle buonomo/yarn-completion
view raw buonomo.js hosted with ❤ by GitHub

Customizing the prompt

I like a minimal prompt with a little info such as the current directory and git metadata. But if you prefer a different style, there are tons of prompts available on the internet.

For my setup, I used the spaceship prompt with the following setup:

antibody bundle denysdovhan/spaceship-prompt
view raw denysdovhan.js hosted with ❤ by GitHub

Since I already have the folder and git information in the status bar in Hyper, I conditionally removed them from the prompt when using Hyper.

Note that you’ll need to install and configure the powerline fonts to be able to display additional symbols in the spaceship prompt. Personally, I use Fira Code, which supports these symbols.

Another similar prompt is pure, but I didn’t use it because of the lack of customizability.

Open new tabs in same directory

If you’re using Terminal.app on macOS, opening a new tab doesn’t preserve the current working directory when using Zsh. To make it work, we need to add the following:

if [[ "$TERM_PROGRAM" == "Apple_Terminal" ]]; then
function chpwd {
printf 'e]7;%sa' "file://$HOSTNAME${PWD// /%20}"
}
chpwd
fi

Wrapping up

To make it easier to copy/paste, here is the complete configuration with all above tweaks:

# Enable autocompletions
autoload -Uz compinit
typeset -i updated_at=$(date +'%j' -r ~/.zcompdump 2>/dev/null || stat -f '%Sm' -t '%j' ~/.zcompdump 2>/dev/null)
if [ $(date +'%j') != $updated_at ]; then
compinit -i
else
compinit -C -i
fi
zmodload -i zsh/complist
# Save history so we get auto suggestions
HISTFILE=$HOME/.zsh_history
HISTSIZE=100000
SAVEHIST=$HISTSIZE
# Options
setopt auto_cd # cd by typing directory name if it's not a command
setopt auto_list # automatically list choices on ambiguous completion
setopt auto_menu # automatically use menu completion
setopt always_to_end # move cursor to end if word had one match
setopt hist_ignore_all_dups # remove older duplicate entries from history
setopt hist_reduce_blanks # remove superfluous blanks from history items
setopt inc_append_history # save history entries as soon as they are entered
setopt share_history # share history between different instances
setopt correct_all # autocorrect commands
setopt interactive_comments # allow comments in interactive shells
# Improve autocompletion style
zstyle ':completion:*' menu select # select completions with arrow keys
zstyle ':completion:*' group-name '' # group results by category
zstyle ':completion:::::' completer _expand _complete _ignored _approximate # enable approximate matches for completion
# Load antibody plugin manager
source <(antibody init)
# Plugins
antibody bundle zdharma/fast-syntax-highlighting
antibody bundle zsh-users/zsh-autosuggestions
antibody bundle zsh-users/zsh-history-substring-search
antibody bundle zsh-users/zsh-completions
antibody bundle marzocchi/zsh-notify
antibody bundle buonomo/yarn-completion
# Keybindings
bindkey '^[[A' history-substring-search-up
bindkey '^[[B' history-substring-search-down
bindkey '^[[3~' delete-char
bindkey '^[3;5~' delete-char
# Theme
SPACESHIP_PROMPT_ORDER=(
user # Username section
dir # Current directory section
host # Hostname section
git # Git section (git_branch + git_status)
hg # Mercurial section (hg_branch + hg_status)
exec_time # Execution time
line_sep # Line break
vi_mode # Vi-mode indicator
jobs # Background jobs indicator
exit_code # Exit code section
char # Prompt character
)
SPACESHIP_PROMPT_ADD_NEWLINE=false
SPACESHIP_CHAR_SYMBOL="❯"
SPACESHIP_CHAR_SUFFIX=" "
# Simplify prompt if we're using Hyper
if [[ "$TERM_PROGRAM" == "Hyper" ]]; then
SPACESHIP_PROMPT_SEPARATE_LINE=false
SPACESHIP_DIR_SHOW=false
SPACESHIP_GIT_BRANCH_SHOW=false
fi
antibody bundle denysdovhan/spaceship-prompt
# Open new tabs in same directory
if [[ "$TERM_PROGRAM" == "Apple_Terminal" ]]; then
function chpwd {
printf 'e]7;%sa' "file://$HOSTNAME${PWD// /%20}"
}
chpwd
fi

You can copy the whole config and paste it to your <rte-code>~/.zshrc<rte-code> file after installing <rte-code>antibody<rte-code> and it should work without any changes. Let me know if you have any questions and I’ll try to answer them. Note that I’m no expert at this and might be missing crucial config options. Most guides on the internet use Oh My Zsh or don’t explain much, so I was left to figure things out by reading various configs. If I’m missing something, please leave a comment and I’ll try to update the guide.

Also, if you’re curious, I have used Hyper with the hyperminimal plugin and the hyperterm-palenight theme in the screenshots above.

Insights

Learn more about Developer Experience

cover

May 5Article

Codex Ambassador: Q1 Recap Across 5 Cities

A short recap of Codex events in Berlin, Wroclaw, Warsaw, Sopot, and Miami, plus what we learned from each format and where we want to go next.

cover

Feb 5Live Stream

Storybook Explained: From Basics to Advanced Workflows

Core Storybook concepts, stories and args, interaction testing, and how Storybook works in React Native projects.

cover

Jan 29Article

Announcing AI SDK Profiler for React Native

Announcing the AI SDK Profiler plugin for Rozenite DevTools. Capture OpenTelemetry spans from the Vercel AI SDK and inspect AI requests across on-device and cloud providers.

cover

Nov 28Talk

How I Hacked React Native DevTools (And Built a Plugin Framework)

Learn how React Native DevTools work under the hood, and how to inject custom plugins with clean hooks and no forks.

cover

Sep 16Talk

How I Hacked React Native DevTools (And Built a Plugin Framework)

Learn how React Native DevTools work under the hood, and how to inject custom plugins with clean hooks and no forks.

cover

Jul 28Article

Introducing Rozenite: A Plugin Framework for React Native DevTools

Build custom debugging panels inside React Native DevTools with Rozenite: a modular, TypeScript-ready plugin framework with full device-scoped support.

cover

Feb 12Article

How to Easily Create Native Libraries With Nitro and Turbo Modules

Learn how to optimize React Native performance with Turbo and Nitro Modules. Ditch the legacy bridge and master modern native module development.

cover

Dec 4Podcast

Radon IDE: Better Developer Experience for React Native Teams

Find out how Radon IDE can help increase team velocity and rid you of the common React Native app development pain points.

cover

Sep 19Podcast

Exploring Bun: Jarred Sumner on Hyperfast JavaScript Toolkit

Is Bun the future of React Native package management? Join us as we talk with Jarred Sumner, the creator of this lightning-fast JavaScript toolkit.

cover

Sep 11Podcast

Vim: from Zero to Hero

Discover the power of Vim, the legendary text editor, as we explore its origins, standout features, and practical tips to boost your coding efficiency.

cover

May 15Article

Add-Ons for Web Browsers With React

At times you may need to create an add-on to use a web browser more effectively. Find out how to build one with React.

cover

Jan 27Article

Why Is It Worth to Automate Your Dependency Management with `Autolinking`?

When you automate your dependency management, you can fully focus on developing your app. Find out how you can do it with autolinking.

cover

Mar 19Tutorial

The Hard Way vs. The React Native AI SDK Way: Stop Writing Custom Modules for Every Model

Learn how React Native AI uses a unified provider model to switch between cloud and on-device LLMs without rewriting application logic, enabling reliable AI experiences online and offline.

cover

Mar 12Tutorial

Build Smarter Apps: Tool Calling & AI Orchestration Explained

Learn how on-device models in React Native can call tools, interact with external APIs, and return structured outputs you can use directly in application logic.

cover

Mar 5Tutorial

MLC LLM + React Native: On-Device AI Without the Pain

Learn how to run third-party on-device LLMs in React Native using MLC LLM. Choose your models, run them efficiently across platforms, and keep a unified JavaScript API with React Native AI.

cover

Feb 24Tutorial

Intelligent Fallbacks with Apple Intelligence in React Native

Learn how to use Apple’s built-in Foundation Models in React Native apps, reduce memory usage, and enable fast, fully on-device AI with React Native AI Apple.

cover

Feb 10Tutorial

What Is the React Native AI SDK? A Complete Intro & Quickstart

Learn why on-device AI matters for React Native apps, how local LLMs behave offline, and what problems React Native AI is designed to solve from day one.

cover

Jan 29Tutorial

Implementing an Android TurboModule with Kotlin

Learn how to implement a React Native TurboModule on Android, from the TypeScript spec and Codegen to the Kotlin implementation and package registration.

cover

Jan 19Tutorial

Working with Different Threads in Swift TurboModules

Learn how JavaScript, native module, background, and main threads interact in React Native TurboModules, and how to use GCD queues to run async work safely in Swift.

cover

Jan 9Tutorial

How to Add Type-Safe Constants to Swift TurboModules

Learn how to expose typed, immutable constants from a Swift TurboModule using Codegen, and get full end-to-end type safety between native and JavaScript.

cover

Dec 30Tutorial

Adding Event Emitters to Your TurboModule in Swift

Learn how to emit native events from a Swift TurboModule and subscribe to them in JavaScript, including proper memory management and Codegen integration.

cover

Dec 22Tutorial

Writing Your First TurboModule in Swift

Learn how to build a fully working TurboModule in Swift, integrate it with Codegen, and bridge it through Objective‑C inside an Expo app.